

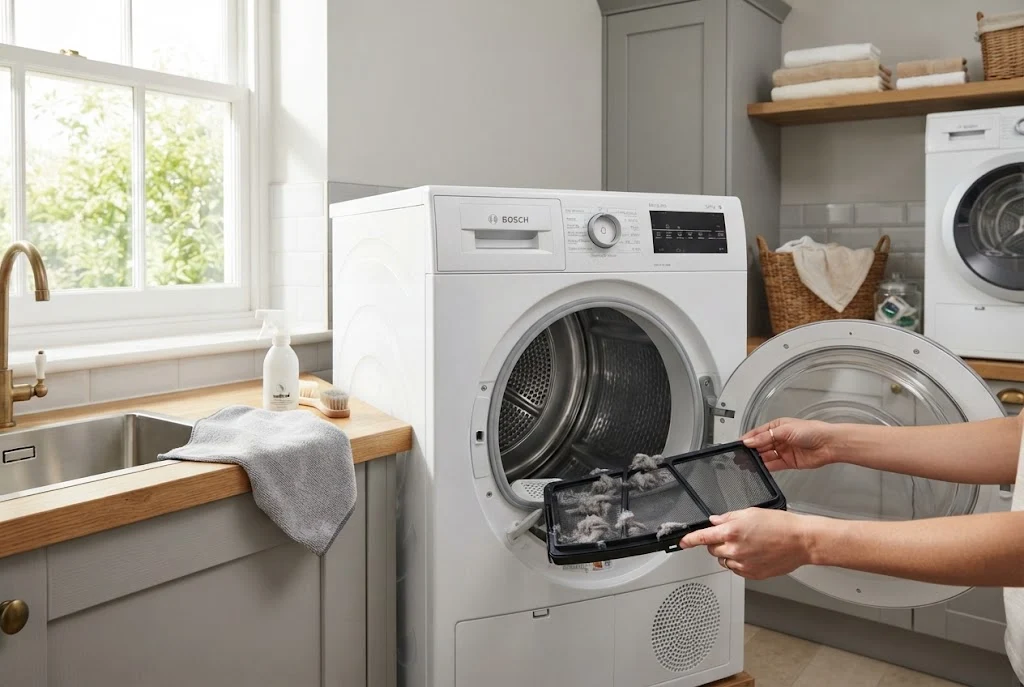
Learning how to clean a dryer properly can help keep your appliance hygienic, efficient and safer to use. Tumble dryers collect lint, fluff, dust and residue during normal operation, particularly around the filter, door area and ventilation system. Regular cleaning also gives you an opportunity to spot problems before they become more serious.
Although every dryer is slightly different, the basic cleaning process is straightforward. You can usually clean the accessible parts yourself using simple household supplies, while deeper servicing should follow the manufacturer’s instructions. This guide explains how to clean a clothes dryer from the outside in, including the drum, filter, door area and ventilation points.
Why You Should Clean Your Dryer Regularly
A dryer works by moving warm air through wet clothing while moisture is removed from the load. During this process, fibres and lint can separate from fabrics and collect inside the appliance. If these areas are neglected, airflow may become restricted and drying performance can suffer.
Regular cleaning can also make laundry routines more efficient. A dryer that is free from excessive lint and residue can move air more effectively, while a clean drum and door area help prevent unwanted smells from transferring to freshly washed clothes.
There is also an important safety reason to maintain your appliance. Electrical Safety First advises households to clean tumble dryer lint and fluff from the filter and around the door after every use, while other components should be cleaned according to the manufacturer’s instructions.
How to Clean a Dryer Safely
Before you start cleaning, switch the dryer off and allow it to cool completely. If your manufacturer’s instructions recommend disconnecting the appliance from the power supply before cleaning, follow that procedure.
Gather a few basic supplies:
- A soft microfibre cloth
- A vacuum cleaner with a narrow attachment
- Warm water
- A small amount of mild washing-up liquid
- A soft brush, if recommended for your appliance
- A dry cloth or towel
Avoid spraying water or cleaning products directly onto electrical controls, sockets, vents or other areas where liquid could enter the appliance.
How to Clean a Dryer Step by Step
1. Clean the Lint Filter
The lint filter should be one of the first areas you clean. Remove the filter according to your dryer’s instructions and clear away the accumulated fluff by hand or with a suitable soft brush or vacuum attachment.
If the filter can be washed, clean it according to the manufacturer’s instructions and allow it to dry completely before putting it back. Some filters are designed for dry cleaning only, so do not automatically soak every filter in water.
Cleaning the filter after every load is a useful habit. It prevents a large amount of lint from accumulating and helps maintain airflow through the appliance.
For a more detailed guide, see our related article on how to clean a dryer filter.
2. Clean Around the Door and Seal
Open the dryer door and inspect the edges, door frame and seal. Small fibres can collect in these areas, especially after drying towels, fleece garments and other fabrics that produce considerable lint.
Use a dry or slightly damp microfibre cloth to wipe the accessible surfaces. If you find loose lint, remove it before wiping the area. Take care around the seal and avoid using harsh chemicals that could damage rubber or plastic components.
3. Clean the Dryer Drum
The inside of the drum can collect dust, fabric fibres and residue from laundry products. To clean it, wipe the drum with a soft cloth lightly dampened with warm water and a small amount of mild detergent.
Pay particular attention to visible marks or sticky residue. Once the drum has been cleaned, wipe it again with a clean damp cloth to remove detergent residue. Finish with a dry cloth and leave the door open for a while so the interior can dry fully.
Do not use abrasive pads or aggressive chemicals unless your manufacturer’s instructions specifically permit them. The finish inside the drum can vary between models.
4. Vacuum Accessible Lint and Dust
Use a vacuum cleaner to remove loose lint and dust from accessible areas around the filter housing, door opening and other locations identified in your appliance manual.
A narrow vacuum attachment can make this easier because it can reach into small spaces without requiring you to dismantle the dryer. Never remove covers or internal electrical components simply to clean behind them unless the manufacturer specifically provides instructions for doing so.
5. Clean the Exterior
Cleaning the outside of the appliance is simple but often overlooked. Wipe the top, front, sides and control area with a soft, slightly damp cloth. If necessary, use a small amount of mild detergent on the cloth rather than applying liquid directly to the machine.
Dry the surfaces afterwards, particularly around buttons, displays and control panels. Keeping the exterior clean also makes it easier to notice warning signs such as scorch marks, cracks or other visible damage.
6. Check the Ventilation Area
If your dryer uses an external vent, inspect the accessible vent hose and surrounding area for lint, dust, crushing or obvious blockages. Good airflow is important for dryer performance.
Do not disconnect or modify ventilation components unless the manufacturer’s instructions allow you to do so safely. If you notice significant blockage, damage or persistent airflow problems, professional inspection may be appropriate.
For a vented appliance, cleaning the dryer duct can be an important part of wider maintenance, but the exact process depends on the dryer and ventilation setup.
How Often Should You Clean a Dryer?
The most important cleaning task is the lint filter. Electrical Safety First recommends cleaning lint and fluff from the filter and around the door after every use. Other areas can be cleaned according to the appliance manufacturer’s maintenance schedule.
A practical routine could look like this:
- After every load: Remove lint from the filter and check around the door.
- Weekly: Wipe the accessible door area and inspect for accumulated dust or fluff.
- Monthly: Clean the drum and vacuum accessible lint around the filter housing.
- Periodically: Inspect ventilation areas and complete any maintenance recommended by the manufacturer.
The exact frequency can vary depending on how often you use the appliance, the fabrics you dry and the design of your dryer.
Signs Your Dryer Needs Cleaning
Sometimes the appliance gives you clues that maintenance is overdue. Watch for changes such as clothes taking noticeably longer to dry, unusual heat, excessive lint around the appliance or a burning smell.
A blocked or poorly maintained dryer can also show reduced drying performance. If your clothes are consistently coming out damp after normal cycles, do not simply keep increasing the drying time. Check the filter, ventilation and manufacturer’s troubleshooting guidance first.
Some warning signs require more than cleaning. If you notice scorch marks, damaged cables, unusual electrical noises, persistent burning smells or other signs of an electrical fault, stop using the appliance and seek advice from the manufacturer or a qualified repair professional.
Common Mistakes When Cleaning a Dryer
Using Too Much Water
A dryer is an electrical appliance, so excessive moisture should never be allowed to enter electrical components. Use a lightly dampened cloth for suitable surfaces and follow the manufacturer’s cleaning instructions.
Ignoring the Filter
Cleaning the drum occasionally does not replace regular filter maintenance. The filter collects lint during drying and should be checked after each use.
Using Harsh Cleaning Products
Strong chemicals, abrasive cleaners and rough scouring pads can damage appliance surfaces, seals or finishes. Mild cleaning methods are generally preferable unless your manufacturer’s instructions specify otherwise.
Dismantling the Appliance
Never remove electrical covers or dismantle internal components simply because an area is difficult to reach. If deep cleaning or servicing is necessary, use the manufacturer’s guidance or a qualified professional.
Dryer Cleaning and Fire Safety
Cleaning is not only about keeping your laundry area looking tidy. Lint is combustible, which is why dryer maintenance should be treated as part of normal appliance safety.
Electrical Safety First recommends cleaning the lint filter after every use and following the manufacturer’s instructions for cleaning other parts of the dryer. It also advises against powering a tumble dryer through an extension lead and recommends avoiding running the appliance while asleep or away from home.
For additional UK appliance safety guidance, Electrical Safety First’s tumble dryer safety advice provides further information on maintenance, ventilation and safe use.
How to Keep Your Dryer Cleaner for Longer
A few simple habits can reduce the amount of cleaning required between deeper maintenance sessions. Always empty pockets before washing and drying clothes because paper, tissues and other small objects can create additional debris.
Avoid overloading the machine, as clothes need adequate space for air to circulate. Clean the lint filter consistently, keep the area around the appliance reasonably dust-free and follow the maintenance schedule supplied with the dryer.
It is also useful to pay attention to what you put into the appliance. Clothing contaminated with substances such as oils, grease or solvents may require special handling and should not automatically be placed in a tumble dryer. Follow the garment-care instructions and manufacturer guidance.
How to Clean a Dryer Without Damaging It
The safest approach is simple: clean only the areas that are designed to be accessed by the user, use gentle cleaning materials and follow the specific instructions for your model. Dryer designs differ, particularly between vented, condenser and heat-pump machines.
That distinction matters because a condenser dryer has components that need different maintenance from a traditional vented dryer. If you own a condenser model, our guide on how to clean a condenser tumble dryer can help you focus on the relevant components without repeating the general cleaning steps covered here.
Final Thoughts
Knowing how to clean a dryer gives you a simple maintenance routine that can improve cleanliness, airflow and everyday performance. Start with the lint filter, then clean the door area, drum and accessible ventilation points according to your manufacturer’s instructions.
Regular maintenance is much easier when it becomes part of your normal laundry routine. A few minutes after each load, combined with deeper cleaning at appropriate intervals, can help keep your dryer in better condition and make it easier to spot potential problems early.

1 Comment
Pingback: How to Clean a Washing Machine Filter Safely