

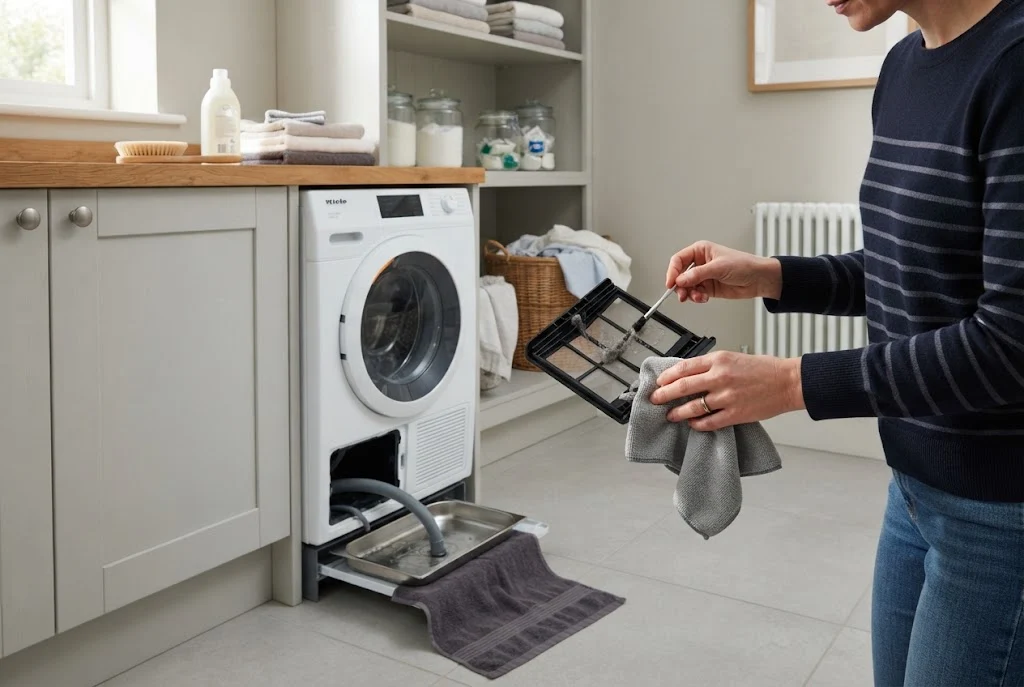
Learning how to clean a washing machine filter is an important part of maintaining your washing machine. The filter can collect lint, hair, coins, buttons and other small objects that escape from clothing during a wash. If this area is neglected, the machine may develop drainage problems, unpleasant smells or reduced performance.
Fortunately, cleaning a washing machine filter is usually a straightforward maintenance task. The exact filter location and removal method vary between machines, so your manufacturer’s instructions should always be checked first. With the right preparation, you can remove trapped debris, clean the accessible filter area and help your washing machine continue working properly.
This guide explains how to clean a washing machine filter safely, how often to check it, what to do when the filter is blocked and which common mistakes to avoid.
Why Does a Washing Machine Have a Filter?
The washing machine filter helps protect the drainage system by catching objects and debris that may otherwise travel further into the appliance. Small items can accidentally remain in pockets, while fibres, hair and other material can become detached from clothing during washing.
Over time, this debris can accumulate. A dirty or blocked filter may contribute to slow drainage, standing water or unpleasant odours. Regular maintenance helps prevent a small amount of trapped debris from becoming a larger problem.
The filter is particularly worth checking if you have noticed that a washing machine is taking longer to drain than usual or leaving water behind at the end of a programme.
How to Clean a Washing Machine Filter Safely
Before you begin, switch off the washing machine and follow the safety instructions in the manufacturer’s manual. If the machine has recently completed a hot wash, allow it to cool before working near any remaining water.
Prepare a few simple items:
- A shallow container or tray
- Old towels or absorbent cloths
- A soft brush
- Warm water where permitted
- A clean microfibre cloth
- Rubber gloves if preferred
Do not force the filter or remove components that are not designed for routine user maintenance. Washing machines differ considerably, so the manufacturer’s instructions should determine how the filter is accessed and cleaned.
How to Clean a Washing Machine Filter Step by Step
1. Locate the Filter
The filter is commonly located behind a small access panel near the lower front of the washing machine, although its position varies by model.
Check the owner’s manual if you cannot immediately identify it. Some appliances use a different drainage or filter arrangement, so avoid opening panels at random.
2. Prepare for Residual Water
Before removing the filter, place towels underneath the access area and position a shallow container where it can catch water. Even after a wash programme has finished, water may remain inside the drainage system.
This step is easy to overlook. Preparing the floor before opening the filter can prevent a small amount of trapped water from spreading across the laundry room.
If your appliance has an emergency drain hose, use it only according to the manufacturer’s instructions. Do not pull or disconnect components that are not intended for user access.
3. Remove the Filter Carefully
Once the area is prepared, remove the filter according to the instructions for your washing machine. Turn or release it in the specified direction rather than applying excessive force.
Water may begin to drain as the filter is loosened. Allow it to collect in the container and replace the container or towels as necessary.
If the filter will not move, do not use excessive force or tools that could damage it. Consult the manufacturer’s guidance or seek professional assistance.
4. Remove Trapped Debris
Inspect the filter once it has been removed. You may find lint, hair, threads and other small debris. Coins, buttons and other objects can also become trapped if they were left in clothing pockets.
Remove visible debris carefully. Check around the filter for anything that could obstruct the drainage system, but do not push objects deeper into the appliance.
This is also a good opportunity to look for signs of damage. If the filter is cracked, broken or no longer fits securely, check the manufacturer’s replacement instructions.
5. Wash the Filter if Permitted
If your manufacturer’s instructions allow the filter to be washed, rinse it with warm water and gently remove remaining residue using a soft brush or cloth.
Avoid aggressive scrubbing, sharp objects and strong chemicals. The aim is to remove debris without damaging the filter or its sealing surfaces.
If your appliance instructions specify a different cleaning method, follow that method instead.
6. Clean the Filter Housing
Cleaning the removable filter alone may not remove all the debris in the surrounding housing. Inspect the accessible area carefully once the filter has been removed.
Use a soft cloth or suitable brush to remove accessible lint, hair and residue. A small amount of water may remain in the housing, so wipe the area carefully rather than introducing unnecessary moisture elsewhere in the appliance.
Do not dismantle the washing machine to reach internal components. Routine filter maintenance should be limited to the areas intended for user access.
7. Check the Filter Area
Before replacing the filter, look inside the accessible opening for obvious obstructions. If you can see a small object that can be safely removed without reaching deeply into the appliance, take it out carefully.
Do not insert tools or your hands into areas that are not designed for access. If an object is lodged inside the drainage system and cannot be removed safely, professional assistance may be appropriate.
8. Refit the Filter Securely
Once the filter and surrounding area are clean, reinstall the filter according to the manufacturer’s instructions. Make sure it is properly seated and tightened.
An incorrectly fitted filter can allow water to leak from the appliance. Before returning to normal laundry use, check that the access panel is closed and the filter is positioned correctly.
How Often Should You Clean a Washing Machine Filter?
There is no single schedule that applies to every washing machine. Some manufacturers recommend checking or cleaning the filter periodically, while the appropriate interval can also depend on how frequently the machine is used.
A practical maintenance routine includes:
- Regularly: Check the filter according to the manufacturer’s recommended schedule.
- After washing heavily soiled items: Consider checking for additional debris if appropriate for your machine.
- When drainage slows: Inspect the filter before assuming there is a larger fault.
- When unusual odours appear: Check accessible drainage and filter areas as part of general maintenance.
Always use the manufacturer’s maintenance schedule as the primary reference. A washing machine used frequently by a large household may require more regular attention than one used only occasionally.
Signs Your Washing Machine Filter Needs Cleaning
A filter does not always look severely blocked before it starts causing problems. Changes in how the washing machine drains can provide an early warning.
Possible signs include water remaining in the drum after a programme, noticeably slow drainage, an unusual smell from the machine or repeated drainage-related error messages.
If the appliance is making unusual noises during draining, inspect the manufacturer’s troubleshooting guidance as well. A trapped object in the drainage system can sometimes produce a different sound from normal operation.
Remember that a dirty filter is only one possible cause. A damaged pump, blocked hose or another technical problem can create similar symptoms.
How to Clean a Washing Machine Filter That Is Blocked
If the filter is heavily blocked, begin by preparing towels and a suitable container because more water may be released when the filter is opened.
Remove visible debris gradually rather than trying to pull everything out forcefully. Hair and threads can become tightly wrapped around components, so take care when clearing them.
Once the removable filter is clean, inspect the accessible housing for additional debris. If the machine still does not drain properly after the filter has been cleaned, do not repeatedly run wash cycles in an attempt to clear the problem.
Instead, check the manufacturer’s troubleshooting guidance. Persistent drainage problems may require inspection of the drain hose, pump or another component.
Can You Use a Lint Remover for Washer Maintenance?
A lint remover for washer is not necessarily a substitute for cleaning the washing machine’s drainage filter. Lint-removing tools can be useful for removing loose fibres from laundry or accessible surfaces, but the washing machine filter is designed to handle debris within the appliance’s drainage system.
Use only tools that are appropriate for your washing machine. Avoid inserting improvised brushes, wires or sharp objects into drainage openings because they may damage components or push debris further into the machine.
The most effective approach is to maintain the actual filter according to the appliance manufacturer’s instructions and use suitable laundry-care tools only where they are intended.
Common Washing Machine Filter Cleaning Mistakes
Forgetting About Residual Water
Opening a filter without preparing for trapped water can result in an avoidable spill. Always place towels and a suitable container underneath the access area first.
Forcing a Stuck Filter
A filter that will not turn or release may have an obstruction or may require a particular removal method. Forcing it can cause damage and create a larger repair problem.
Using Sharp Tools
Knives, screwdrivers and metal objects should not be used to scrape or probe the filter unless the manufacturer specifically instructs you to use an appropriate tool. Gentle cleaning is generally safer.
Ignoring the Filter Housing
Even when the removable filter looks clean, debris may remain around the accessible housing. Check the surrounding area as part of the cleaning process.
Reinstalling the Filter Incorrectly
The filter needs to seal correctly after cleaning. If it is not seated or tightened according to the manufacturer’s instructions, water may leak during operation.
How to Prevent Debris From Reaching the Filter
Good laundry habits can reduce the amount of debris entering the washing machine. Empty pockets before putting clothes into the machine, paying particular attention to coins, tissues, paper and small objects.
Check garments for loose buttons, threads and other items that could detach during washing. If you wash pet bedding or particularly lint-heavy items, inspect the machine’s filter more frequently if recommended by the manufacturer.
Using the correct amount of detergent can also support good washing machine maintenance. Excess detergent may leave residue, while the correct quantity depends on the detergent, load, water conditions and manufacturer’s recommendations.
Washing Machine Filter Cleaning as Part of Laundry Maintenance
A clean washing machine filter is only one part of keeping the laundry area well maintained. The detergent drawer, door seal, drum and other accessible components may also require regular cleaning.
Keeping the washing machine clean can help reduce the build-up of residue and unpleasant smells. Leave the door and detergent drawer open when appropriate after a cycle so accessible areas can dry, while following the manufacturer’s recommendations.
Dryer maintenance deserves similar attention. If you also use a tumble dryer, our guides on how to clean a dryer and how to clean a tumble dryer cover the separate maintenance requirements for drying appliances.
When to Seek Professional Help
Routine filter cleaning is usually a manageable maintenance task, but some problems require professional attention. If the filter cannot be removed safely, the appliance continues to leak or the machine repeatedly fails to drain after cleaning, avoid forcing a repair yourself.
Electrical faults, damaged cables, unusual burning smells or significant mechanical problems should also be treated as reasons to stop using the appliance and seek appropriate professional or manufacturer advice.
If you are unsure whether a component is designed for user maintenance, check the appliance manual before removing it. Washing machine designs vary, and following model-specific instructions is safer than relying on a generic procedure.
Final Thoughts
Knowing how to clean a washing machine filter can help you deal with one of the most important routine maintenance points in your laundry appliance. The basic process involves preparing for residual water, removing the filter carefully, clearing debris, cleaning it according to the manufacturer’s instructions and refitting it securely.
Regular checks can help you spot accumulated lint, hair and foreign objects before they contribute to drainage problems. Just as importantly, good pocket-checking and laundry habits can reduce the amount of debris entering the machine in the first place.
Always remember that washing machine designs differ. Use this guide as a general maintenance overview, but rely on your appliance manufacturer’s instructions for the exact filter location, removal procedure and cleaning method.
