

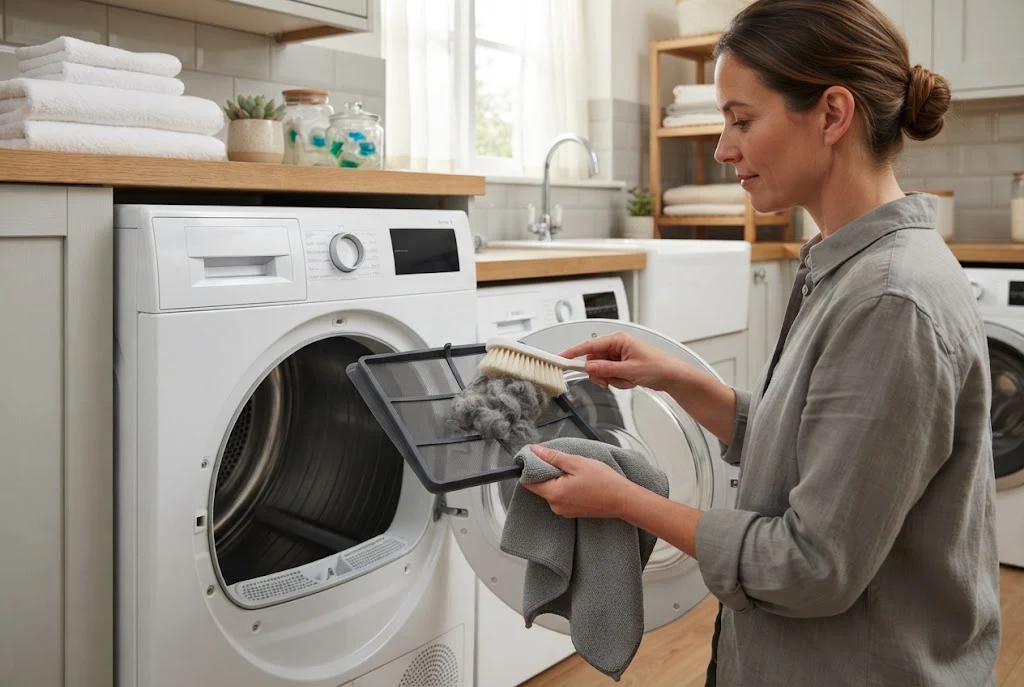
Learning how to clean dryer filter properly is one of the simplest ways to maintain a tumble dryer. The filter catches lint, fluff and loose fibres released from clothing during a drying cycle. When too much debris builds up, airflow can become restricted and the appliance may take longer to dry clothes.
Fortunately, cleaning a dryer filter is usually a quick household task. You do not normally need expensive equipment or specialist cleaning products. The important thing is to remove accumulated lint regularly, clean the filter according to the manufacturer’s instructions and check the surrounding area for additional debris.
This guide explains how to clean a clothes dryer filter safely, how often to do it, when washing the filter is appropriate and how filter maintenance fits into wider dryer care.
Why Is a Dryer Filter Important?
A dryer filter has an important job. As clothes tumble around the drum, small fibres separate from the fabric. Instead of allowing all of that lint to travel through the appliance, the filter captures much of it in one accessible location.
Over time, the filter can become covered with fluff. A heavily loaded filter may reduce effective airflow and contribute to poor drying performance. Regular cleaning therefore helps keep the appliance operating as intended.
There is also a safety reason to take lint seriously. Electrical Safety First advises users to clean lint and fluff from the tumble dryer filter and around the door after every use. Always follow the specific maintenance instructions supplied with your appliance as well.
How to Clean Dryer Filter Safely
Before cleaning, switch the dryer off and allow it to cool if it has recently completed a cycle. Locate the filter using your appliance manual if you are unsure where it is positioned.
You will generally need:
- A vacuum cleaner with a narrow attachment
- A soft brush or cloth
- Warm water, if the filter is washable
- A clean towel
Do not spray cleaning products directly into the filter housing or other electrical areas. The manufacturer’s instructions should always take priority because filters and their cleaning requirements vary between dryer models.
How to Clean Dryer Filter Step by Step
1. Remove the Filter
Open the dryer door and locate the lint filter. Depending on the design, it may be positioned around the door opening, inside the door or in another accessible location.
Remove it carefully rather than forcing it. If you cannot determine how the filter is released, check the appliance manual before proceeding.
2. Remove Loose Lint by Hand
Start by removing the visible layer of lint and fluff. You can usually pull away larger pieces gently with your fingers.
Do this over a bin so that the loose fibres do not fall onto the floor. Avoid pushing the lint deeper into the mesh or filter housing.
3. Vacuum Remaining Debris
After removing the larger pieces, use a vacuum cleaner with a suitable narrow attachment to collect smaller fibres. Vacuum both sides of the accessible filter where appropriate.
A vacuum is particularly useful when fine lint has become embedded around the edges. Work gently so that you do not damage delicate mesh or plastic components.
4. Check Whether the Filter Can Be Washed
Some dryer filters can be washed, while others should be cleaned using a dry method. Never assume that every lint filter can be submerged.
Check your manufacturer’s instructions first. If washing is permitted, rinse the filter with the recommended method and remove any residue or build-up.
If the filter has been washed, allow it to dry completely before reinstalling it. A wet filter should not simply be placed back into the dryer.
5. Clean the Filter Housing
Cleaning the filter itself is only part of the job. Small fibres can remain around the filter housing after the filter has been removed.
Use a vacuum cleaner or soft brush to remove accessible lint from this area. Avoid pushing debris further inside the machine.
Do not remove internal covers or electrical components simply to reach areas that are not designed for routine user cleaning.
6. Reinstall the Dry Filter
Once the filter is completely clean and dry, return it to its correct position. Make sure it sits securely and is installed in the orientation specified by the manufacturer.
A poorly positioned filter may not perform correctly, so never operate the appliance with a removable filter incorrectly fitted or missing unless the manufacturer specifically states otherwise.
How to Clean Clothes Dryer Filter That Has Heavy Build-Up
If a filter has not been cleaned for a long time, you may find a thick layer of compacted lint or residue. Start by removing the loose material carefully rather than trying to scrape aggressively at the surface.
If washing is approved for your particular filter, follow the manufacturer’s cleaning method. Some residue may come from fabric products and can accumulate alongside lint.
Do not use sharp objects to scrape the filter. A damaged mesh or filter surface may no longer perform as intended and could require replacement.
If the filter remains clogged or damaged after cleaning, consult the manufacturer’s support information to determine whether it needs replacing.
How Often Should You Clean a Dryer Filter?
For most households, checking the filter after every drying cycle is the easiest approach. Electrical Safety First recommends removing lint and fluff from the filter and around the door after every use.
A simple routine can help:
- After every load: Remove visible lint and fluff from the filter.
- Weekly: Inspect the filter housing for additional debris.
- Periodically: Give a washable filter a deeper clean if the manufacturer recommends it.
- When performance changes: Check the filter before increasing drying times or changing programmes.
The ideal maintenance frequency can vary according to how often you use the dryer and the types of fabrics being dried. Towels, fleece and other high-lint materials may require particularly frequent attention.
What Happens If You Do Not Clean the Dryer Filter?
A neglected filter can accumulate a significant amount of lint. As the filter becomes increasingly covered, airflow may be affected and drying performance can decline.
You may notice that clothes take longer to dry than they normally do. The dryer may also appear to work harder or require longer programmes to achieve the same result.
However, reduced drying performance does not automatically mean the filter is the only problem. Ventilation, condenser maintenance, heat-pump components and other factors can also affect how an appliance operates.
If cleaning the filter does not resolve an obvious performance issue, consult the manufacturer’s troubleshooting information rather than repeatedly extending drying cycles.
How to Clean Dryer Filter and Improve Overall Maintenance
Filter cleaning works best when it is part of a wider dryer maintenance routine. After removing lint from the filter, check the door area for fibres and wipe accessible surfaces when necessary.
Keep the outside of the appliance free from excessive dust and make sure the area around ventilation openings is not obstructed. If you use a vented dryer, the ventilation system also deserves attention.
For more information about this part of maintenance, see our related guide to cleaning a dryer duct.
Keeping the filter clean should not be viewed as a substitute for the manufacturer’s scheduled maintenance. Different dryers use different designs, and condenser and heat-pump models have additional components that may require their own cleaning procedures.
Common Dryer Filter Cleaning Mistakes
Only Cleaning the Visible Surface
It is easy to remove the obvious layer of fluff and assume the job is complete. Fine fibres can remain around the edges and in the filter housing, so inspect the accessible areas carefully.
Washing a Filter Without Checking the Manual
Not every dryer filter is designed to be washed. Always check the manufacturer’s instructions before using water.
Replacing a Wet Filter
If washing is permitted, allow the filter to dry fully before returning it to the dryer. Avoid introducing unnecessary moisture into an electrical appliance.
Using Sharp Tools
Knives, screwdrivers and other sharp objects can damage filter mesh or plastic components. Gentle cleaning is preferable.
Ignoring a Damaged Filter
A cracked, broken or otherwise damaged filter should not simply be ignored. Check the manufacturer’s replacement guidance and use a suitable replacement when necessary.
When Should You Check the Dryer Duct?
Cleaning the lint filter deals with one of the most accessible sources of fibre accumulation, but vented dryers also depend on suitable airflow through their ventilation system.
If you notice persistent drying problems despite having a clean filter, inspect the accessible ventilation components for obvious issues and follow the manufacturer’s maintenance instructions. A professional may be appropriate if the ventilation system requires work that is outside normal household maintenance.
Never modify a dryer ventilation system simply to increase airflow. The correct arrangement depends on the appliance and installation.
Dryer Filter Cleaning and Fire Safety
Lint deserves regular attention because it is combustible. This is why cleaning the filter should be treated as an essential maintenance habit rather than an occasional cosmetic task.
Electrical Safety First recommends cleaning lint and fluff from the filter and around the door after every use. It also provides guidance on safe tumble dryer operation, including avoiding the use of extension leads for tumble dryers and not leaving the appliance running while asleep or away from home.
For additional UK guidance, Electrical Safety First’s tumble dryer safety advice is a useful authoritative resource.
How to Keep a Dryer Filter Cleaner for Longer
The amount of lint collected by a dryer filter depends partly on the laundry being dried. Regularly cleaning the filter is still essential, but good laundry habits can make maintenance easier.
Empty pockets before washing and drying clothes. Check garments for tissues, paper and other loose items that could create unnecessary debris. Follow clothing care labels and avoid placing unsuitable materials into the dryer.
Do not overload the machine. Clothes need adequate room to tumble and allow warm air to circulate effectively. Always follow the load recommendations provided for your particular dryer.
It is also useful to keep the area around the appliance clean. Dust and lint around the dryer can accumulate over time, making routine maintenance more difficult.
When to Replace a Dryer Filter
Cleaning is not always enough if a filter has become damaged. Inspect the filter periodically for cracks, broken plastic, holes or other visible deterioration.
If the filter no longer fits correctly or its mesh has been damaged, consult the appliance manufacturer for the correct replacement. Using the right filter for your specific model is important because the component is designed to work as part of the dryer’s airflow system.
A replacement filter should not be improvised from unsuitable materials. If you are uncertain about compatibility, use the model number and manufacturer’s support information to identify the correct component.
Final Thoughts
Knowing how to clean dryer filter is one of the easiest ways to build good tumble dryer maintenance habits. Remove lint after every load, clean the filter housing periodically and only wash the filter when the manufacturer confirms that it is suitable for washing.
A clean filter supports proper airflow and helps keep excess lint under control. Combined with regular drum, door and ventilation maintenance, it forms an important part of looking after your laundry appliance.
If you are maintaining the whole laundry area, the next useful step is to look beyond the dryer. Cleaning the washing machine filter can also help keep your complete laundry routine hygienic and well maintained.
